Image

Before you begin, ensure the Excel document is saved as a .xlsx extension.
The file properties for every document should include a brief and accurate title. The document title is the first thing a screen reader will read aloud.
Screen readers keep track of their location in a table by counting table cells. Screen readers also use the first row of information to identify header rows and columns.
Screen readers use header information to identify rows and columns. Clear table headers provide context and make navigating the table content easier.
Alt text is a short description of an image. It ensures that images are accessible to screen reader users.
Right-click on an image. Select "View Alt Text...". ...". (This may be “Edit Alt Text” in other versions of Excel.) Describe what is important about this image in the context of the text that surrounds it.
It is important that links describe what they do and where they will take the user.
Bad link text:
Learn more on our hyperlink explanation page.
Doing this on Mac and Windows looks a little different.
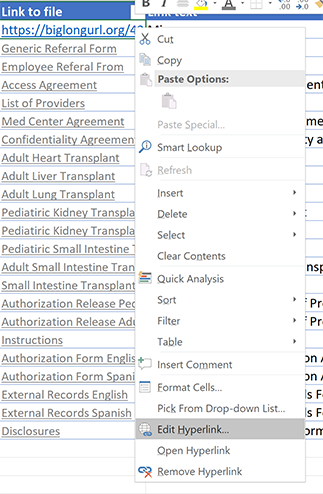
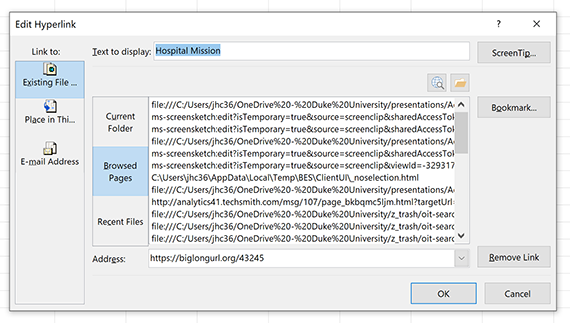
1. Choose the URL, then right-click and choose "Hyperlink".

2. Change the "Text to Display" to a short description of the link's destination. This is the text that will be hyperlinked.
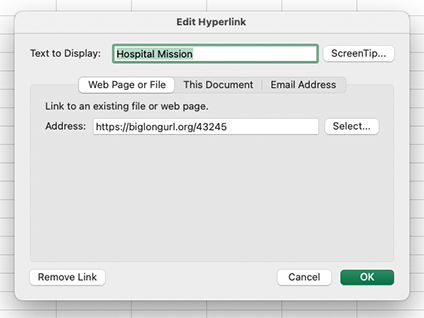
1. Select the URL, then right-click and choose "Link" or "Edit Hyperlink".
2. Change the "Text to Display" to a short description of the link's destination. This is the text that will be hyperlinked.
It is important for people to be able to easily read the text on your page. Avoid colors like yellow or light grey. Read more about it on our color contrast page.
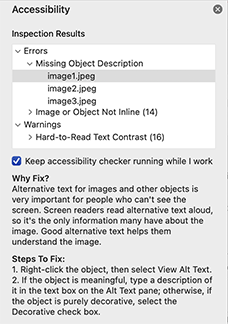
There is a built-in Accessibility Checker on most Microsoft Office products. Note that not all of the issues it flags are barriers to access; if you follow the previous seven tips listed here, your document should be in good shape. When you select an issue in the accessibility checker, it provides tips on why it might be a problem and steps to fix the issue.
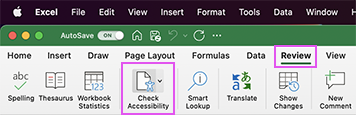
To open it:
1. In the top Ribbon, click the "Review" tab.
2. Select the "Accessibility Checker" button.
3. This will open a panel to the right of the document. Review the issues.
NOTE 1: You can leave it as an Excel spreadsheet (preferred), or save it as a PDF.
Note 2: If you are saving it as a PDF, follow the instructions below. You must export it correctly to preserve the document’s accessibility features.
This is different between a Mac and PC.
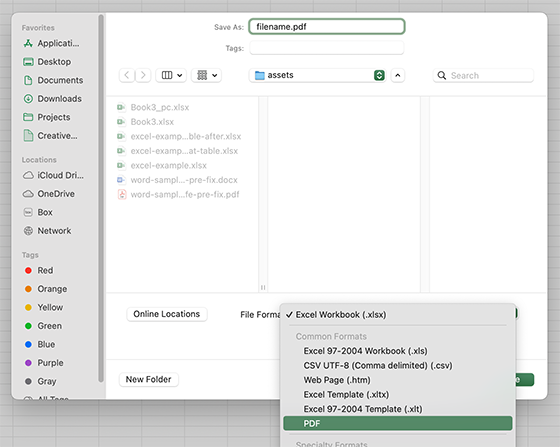
Choose "File > Save a Copy...".
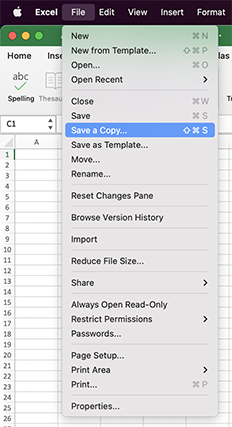
Expand the "File format" dropdown and select "PDF".
Choose "File > Save As...", then "Browse".
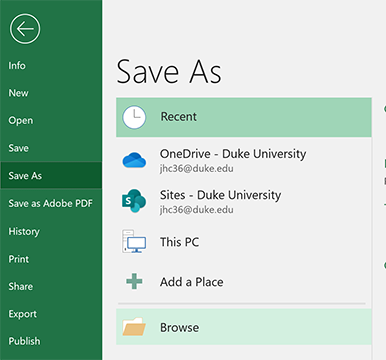
From the"Save as type" dropdown menu, choose "PDF".

Note: If you have a "Save as Adobe PDF" button, you can use that instead. They produce slightly different results. One is not necessarily better than the other.
For more comprehensive training watch LinkedIn Learning Creating Accessible PDFs. It is free when you log in using your Duke email address.